Pro-Form 520 User Manual Page 7
- Page / 32
- Table of contents
- TROUBLESHOOTING
- BOOKMARKS
- USER’S MANUAL 1
- WARNING DECAL PLACEMENT 2
- TABLE OF CONTENTS 2
- IMPORTANT PRECAUTIONS 3
- SAVE THESE INSTRUCTIONS 4
- BEFORE YOU BEGIN 5
- PART IDENTIFICATION CHART 6
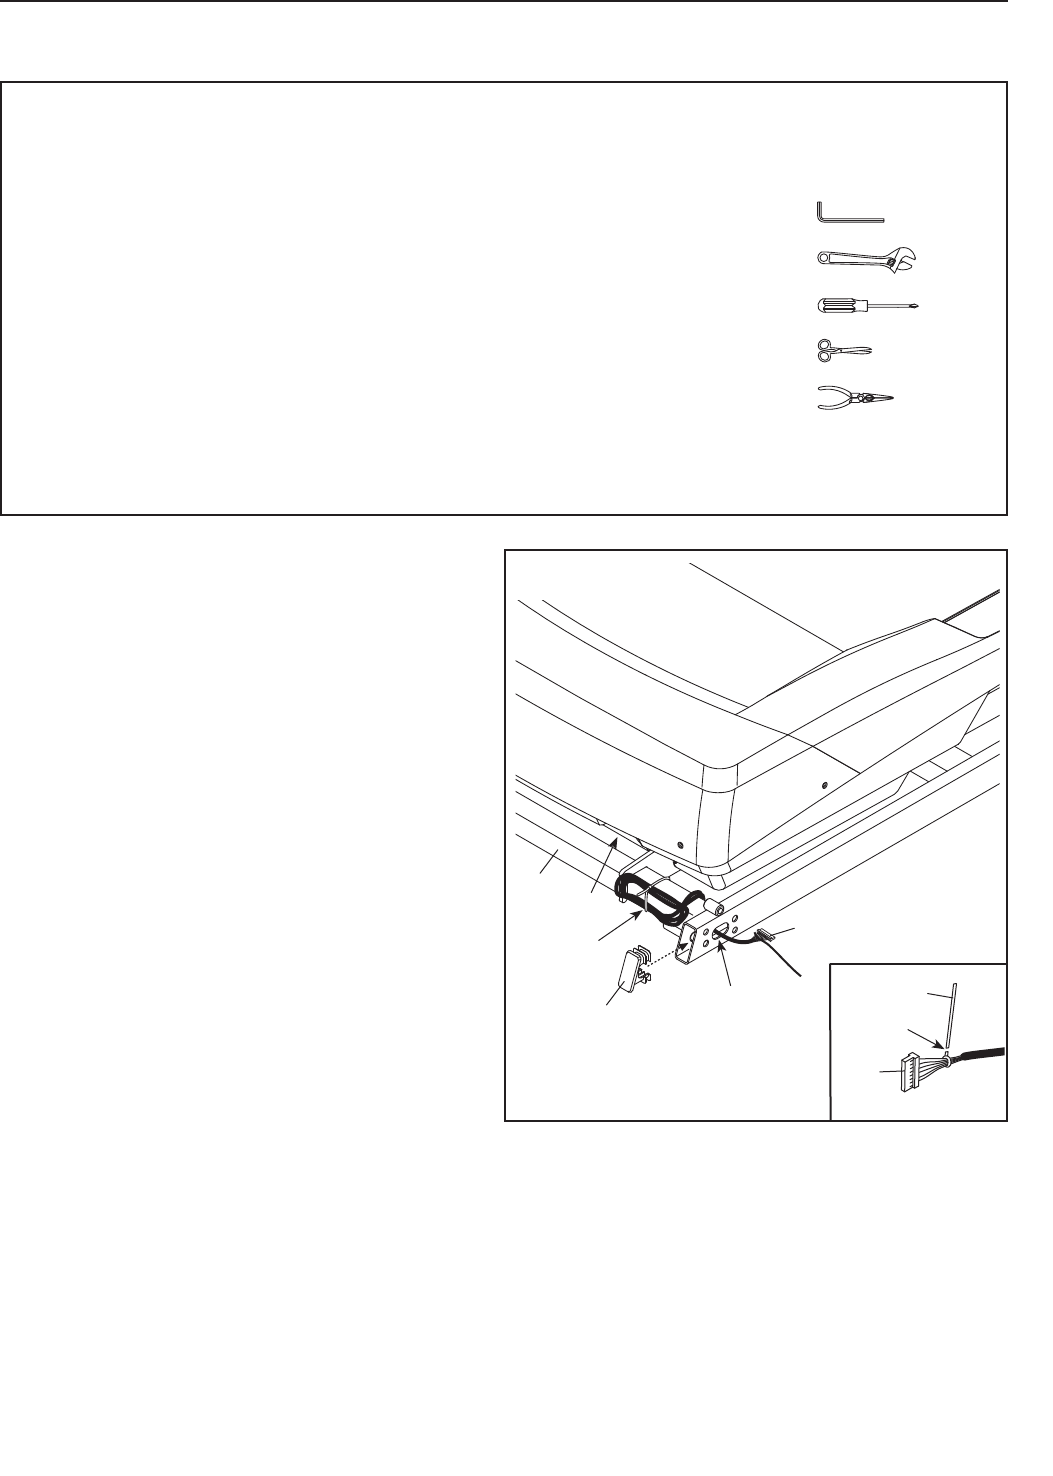
- ASSEMBLY 7
- OPERATION AND ADJUSTMENT 13
- ETPF59112 14
- (PFTL59112) 14
- TROUBLESHOOTING 23
- EXERCISE GUIDELINES 26
- PART LIST 27
- EXPLODED DRAWING A 28
- EXPLODED DRAWING B 29
- EXPLODED DRAWING C 30
- EXPLODED DRAWING D 31
- ORDERING REPLACEMENT PARTS 32
- LIMITED WARRANTY 32
Related products and manuals for Treadmills Pro-Form 520
 (18 pages)
(22 pages)
(32 pages)
(36 pages)
(18 pages)
(18 pages)
(28 pages)
(27 pages)
(36 pages)
(26 pages)
(32 pages)
(36 pages)
(18 pages)
(22 pages)
(32 pages)
(36 pages)
(18 pages)
(18 pages)
(28 pages)
(27 pages)
(36 pages)
(26 pages)
(32 pages)
(36 pages)
© 2020, manymanuals.com. All rights reserved. | 0.041 s |
 Manymanuals.com
 Manymanuals.de
 Manymanuals.fr
 Manymanuals.it
 Manymanuals.pl
 Manymanuals.cz
 Manymanuals.es
 Manymanuals-pt.com
Comments to this Manuals